How to Display Account Data on GitHub Profile
GitHub 为每个账号预留了一个账户同名库,在这个库中填写 README.md 可以直接将这个文件的内容渲染到自己的 GitHub 主页。其中,我们可以用下面几种方式来展示自己的 GitHub 账号数据,丰富主页内容。

一、直接使用公共服务
直接使用公共服务不需要进行任何配置,但由于公共 API 容易遇到 GitHub API 限流、服务不稳定等问题,可能会出现 “Error Fetching Resource” 等报错。
常见公开服务:
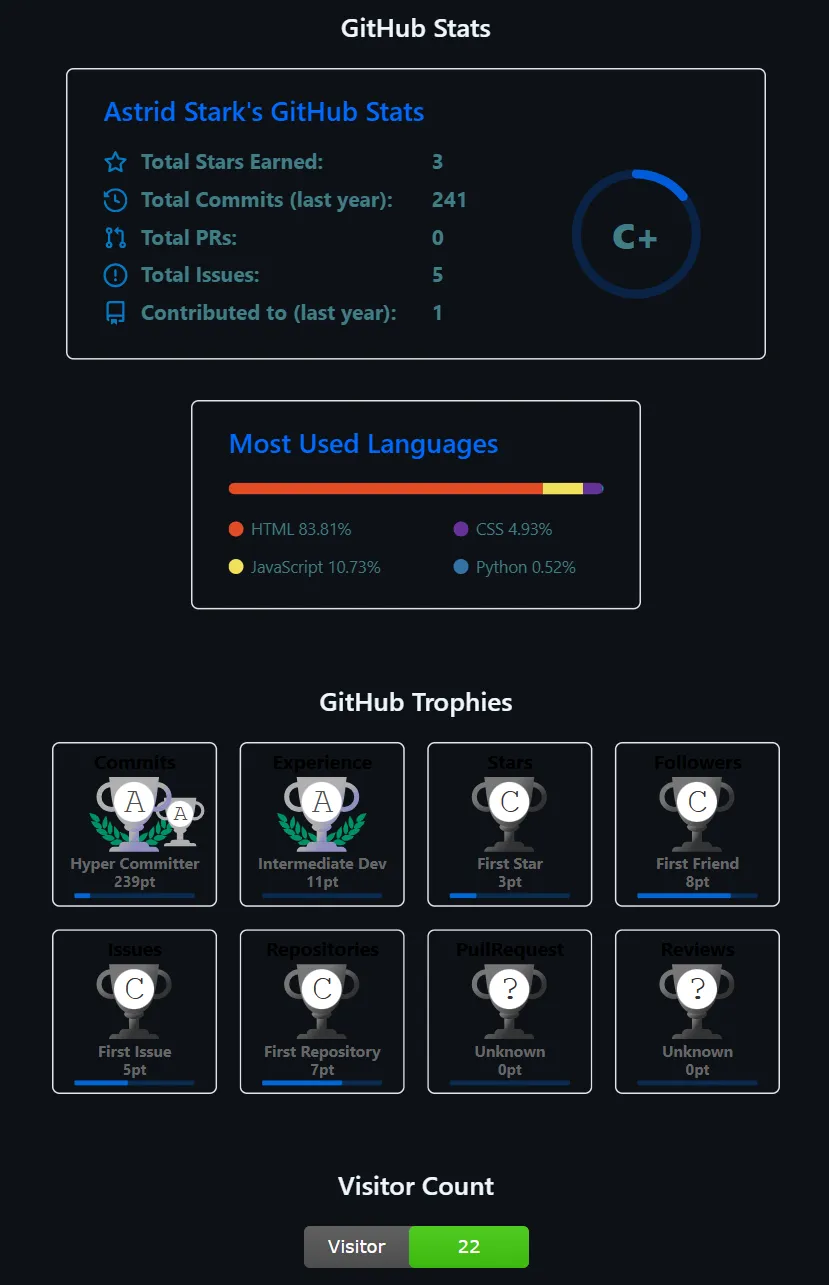
配置 GitHub Profile Trophy:
1
2
3
4
5
|
<div align="center">
<img src="https://github-profile-trophy.vercel.app/?username=用户名&theme=transparent&column=4&row=2&margin-w=15&margin-h=15&no-frame=false&no-bg=true" alt="GitHub Trophies"/>
</div>
</br>
|
配置 GitHub Readme Stats:
1
2
3
4
5
6
7
8
9
|
<div align="center">
<img src="https://github-readme-stats.vercel.app/api?username=用户名&show_icons=true&count_private=true&theme=transparent" alt="GitHub Stats"/>
</div>
</br>
<div align="center">
<img src="https://github-readme-stats.vercel.app/api/top-langs/?username=用户名&layout=compact&theme=transparent" alt="Top Languages"/>
</div>
</br>
|
链接填写处的参数配置参考源代码库的 README.md 文件。
二、Fork 源仓库后自托管到 Vercel
当遇到 GitHub API 限流、服务不稳定等问题时,可以采用这种方法进行自托管。
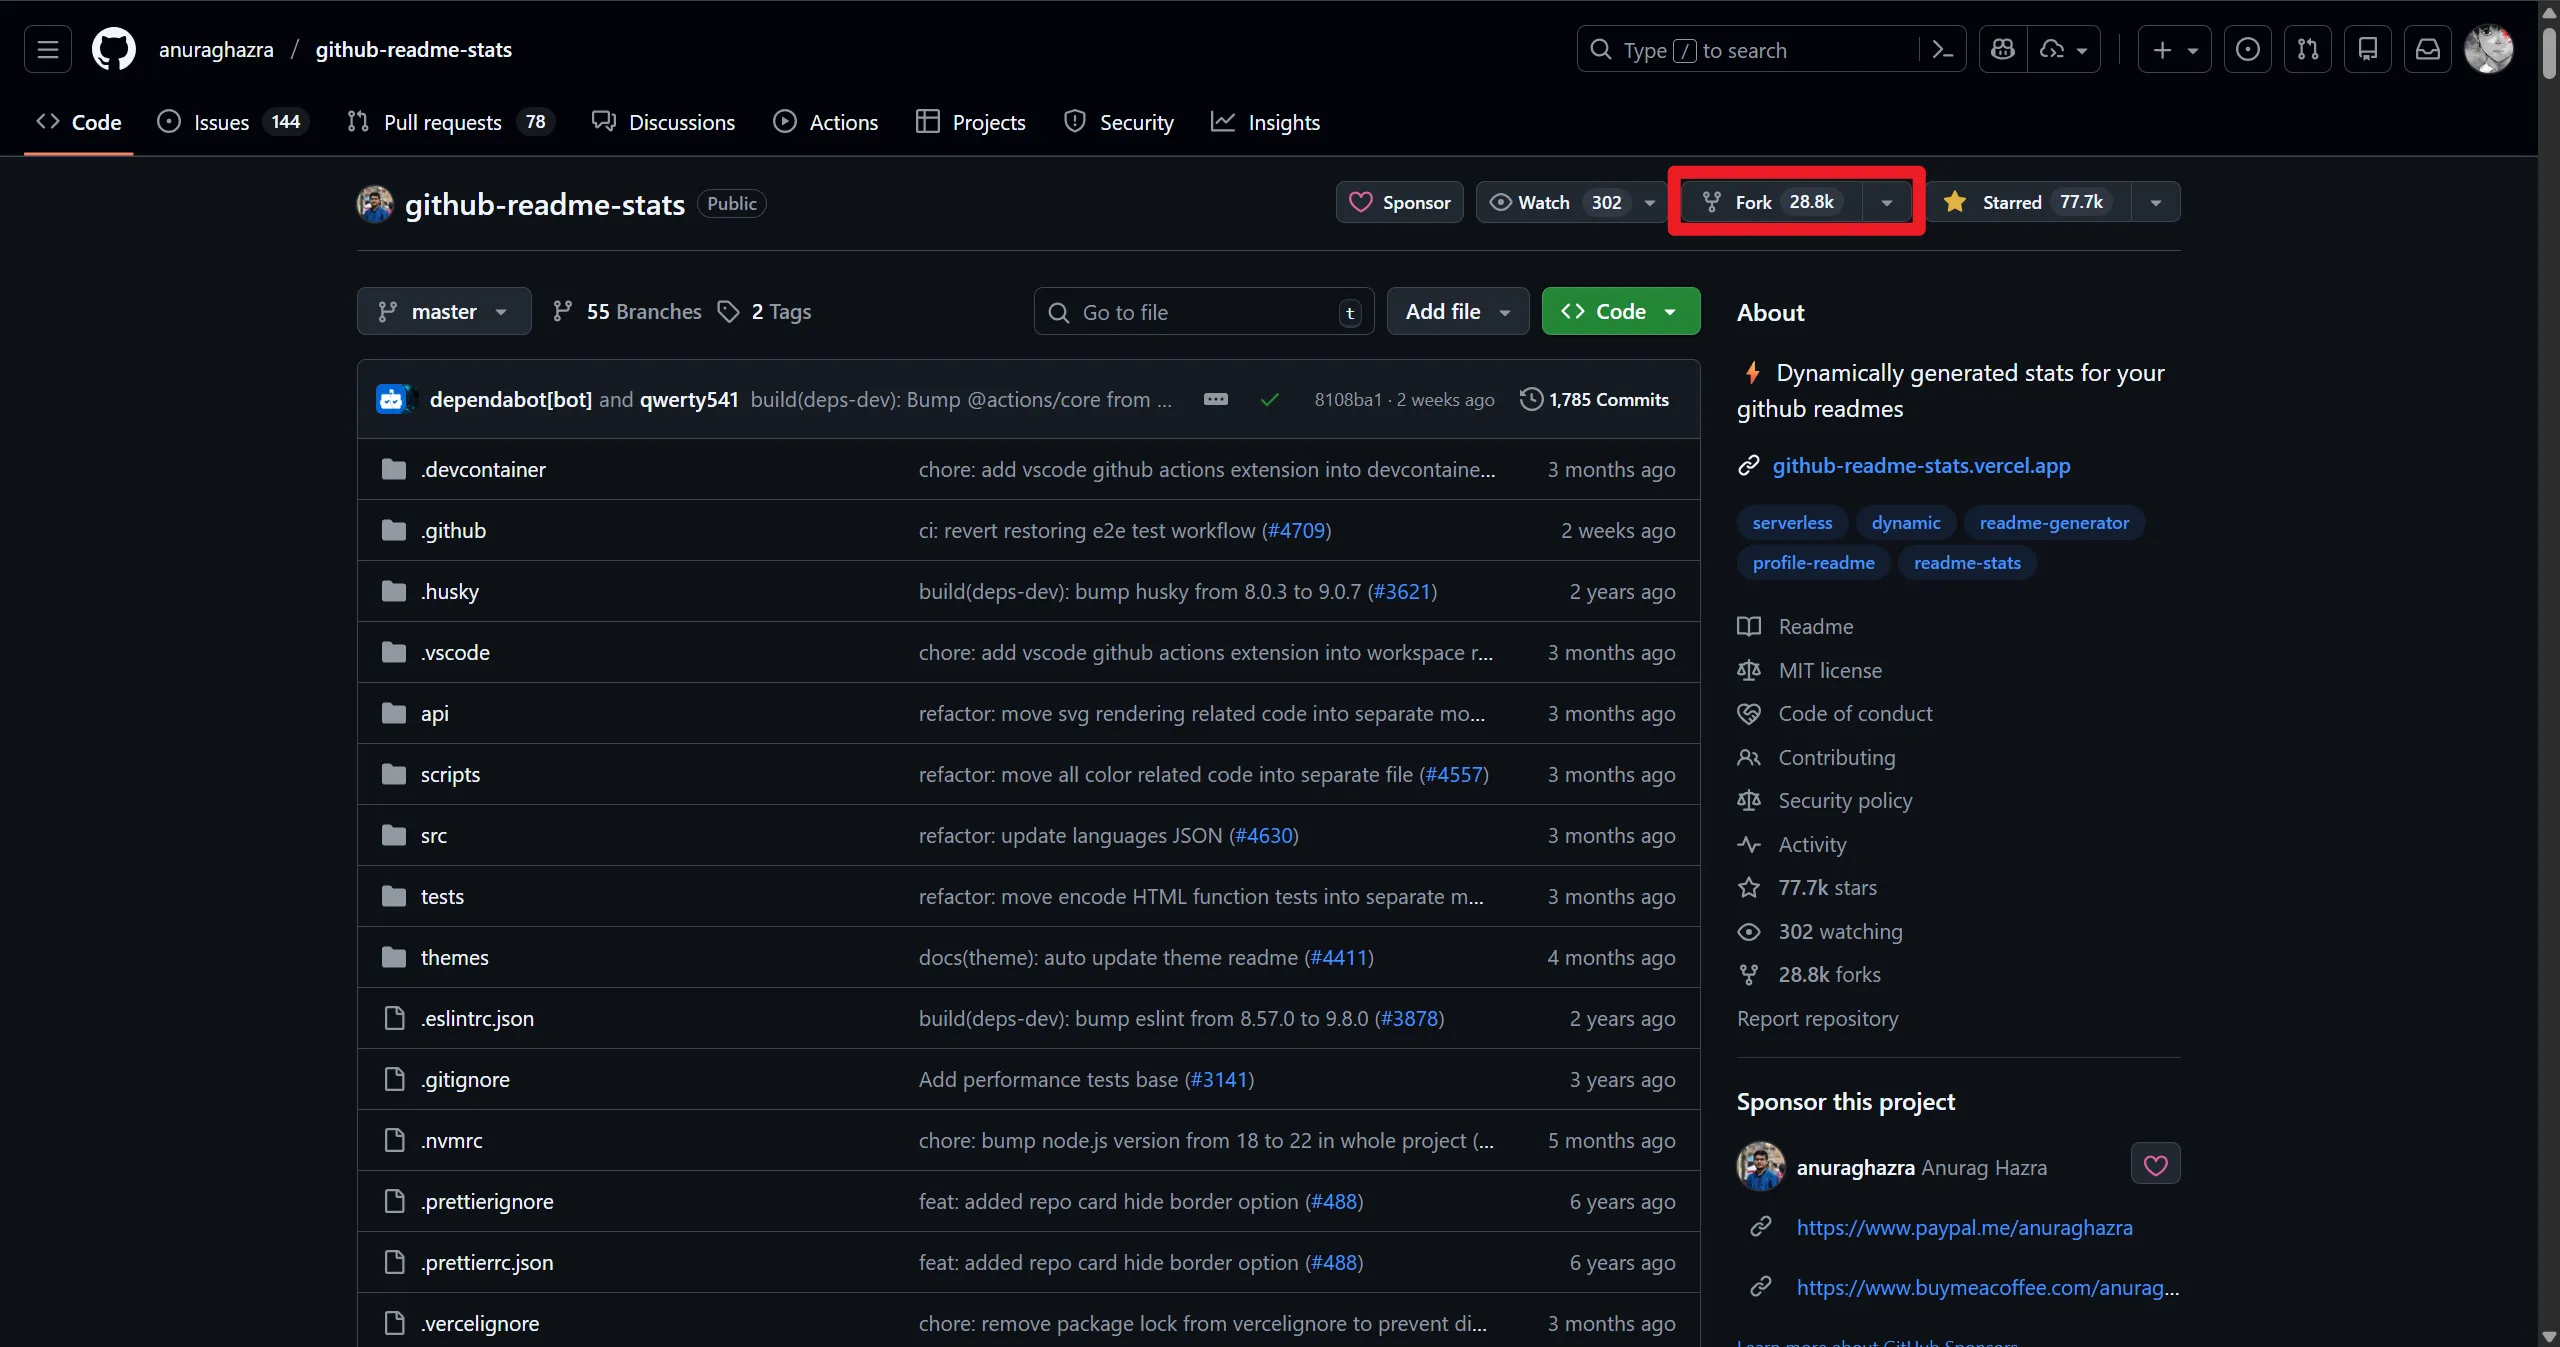
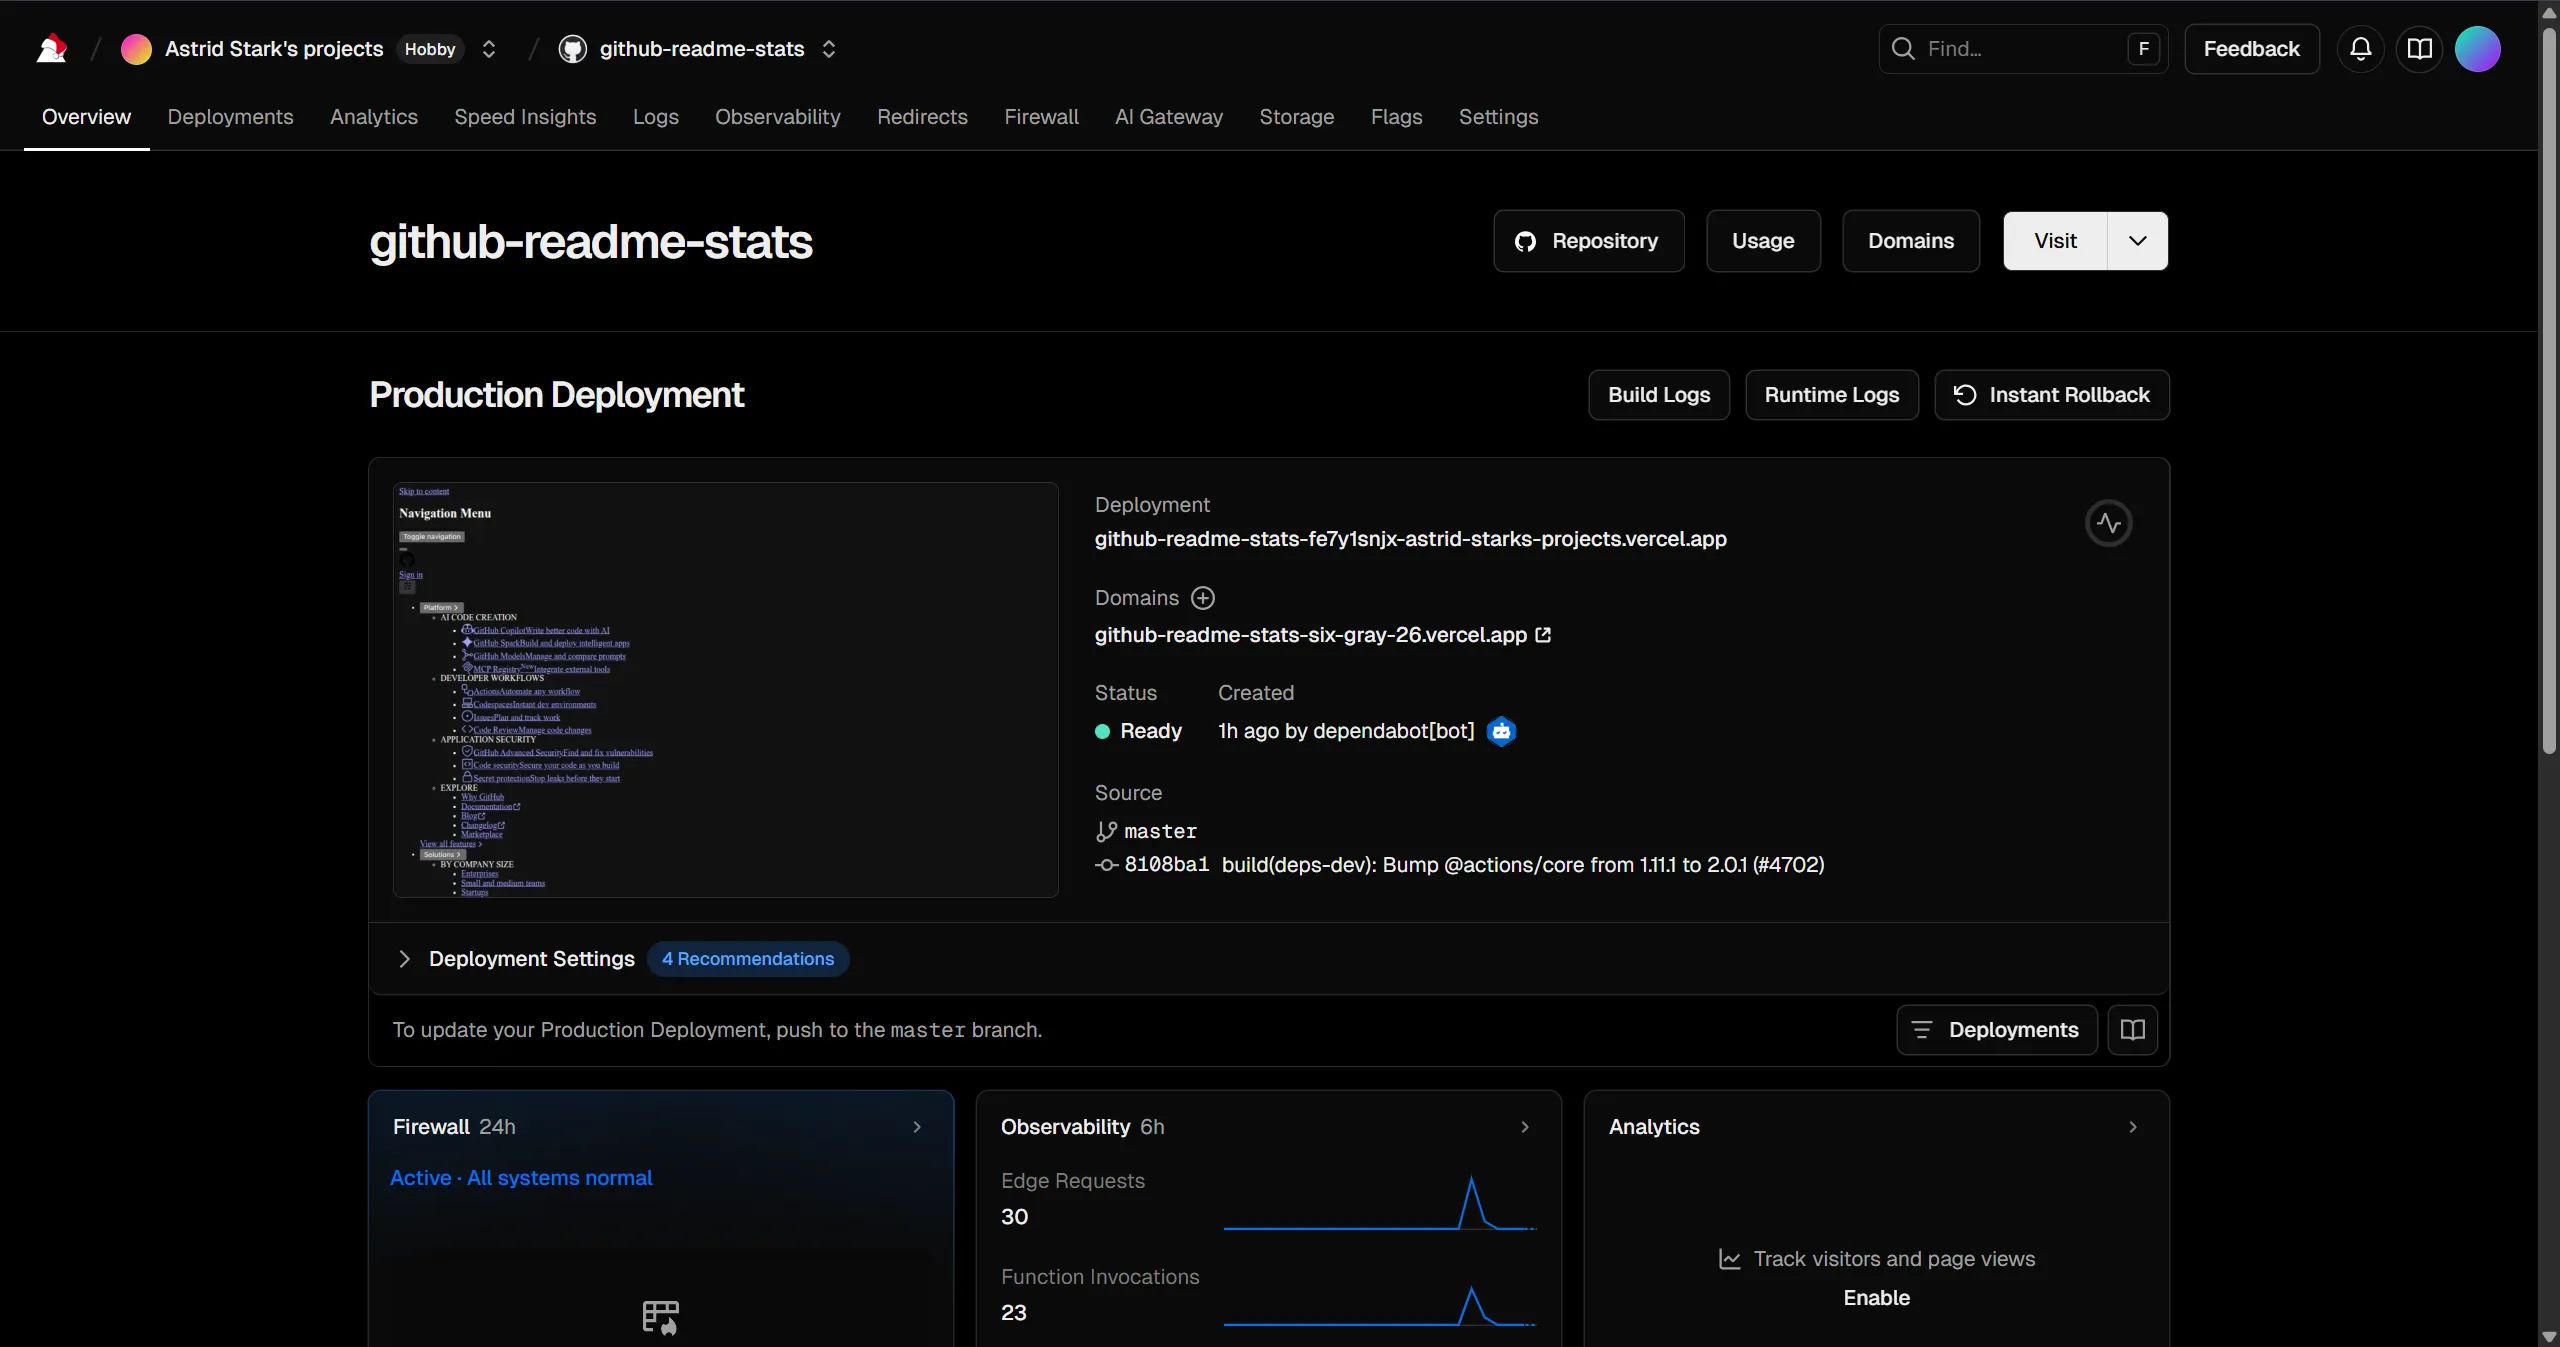
以 github-readme-stats 为例。首先,点击右上角的 Fork 按钮,将源代码库 fork 到自己的账号。
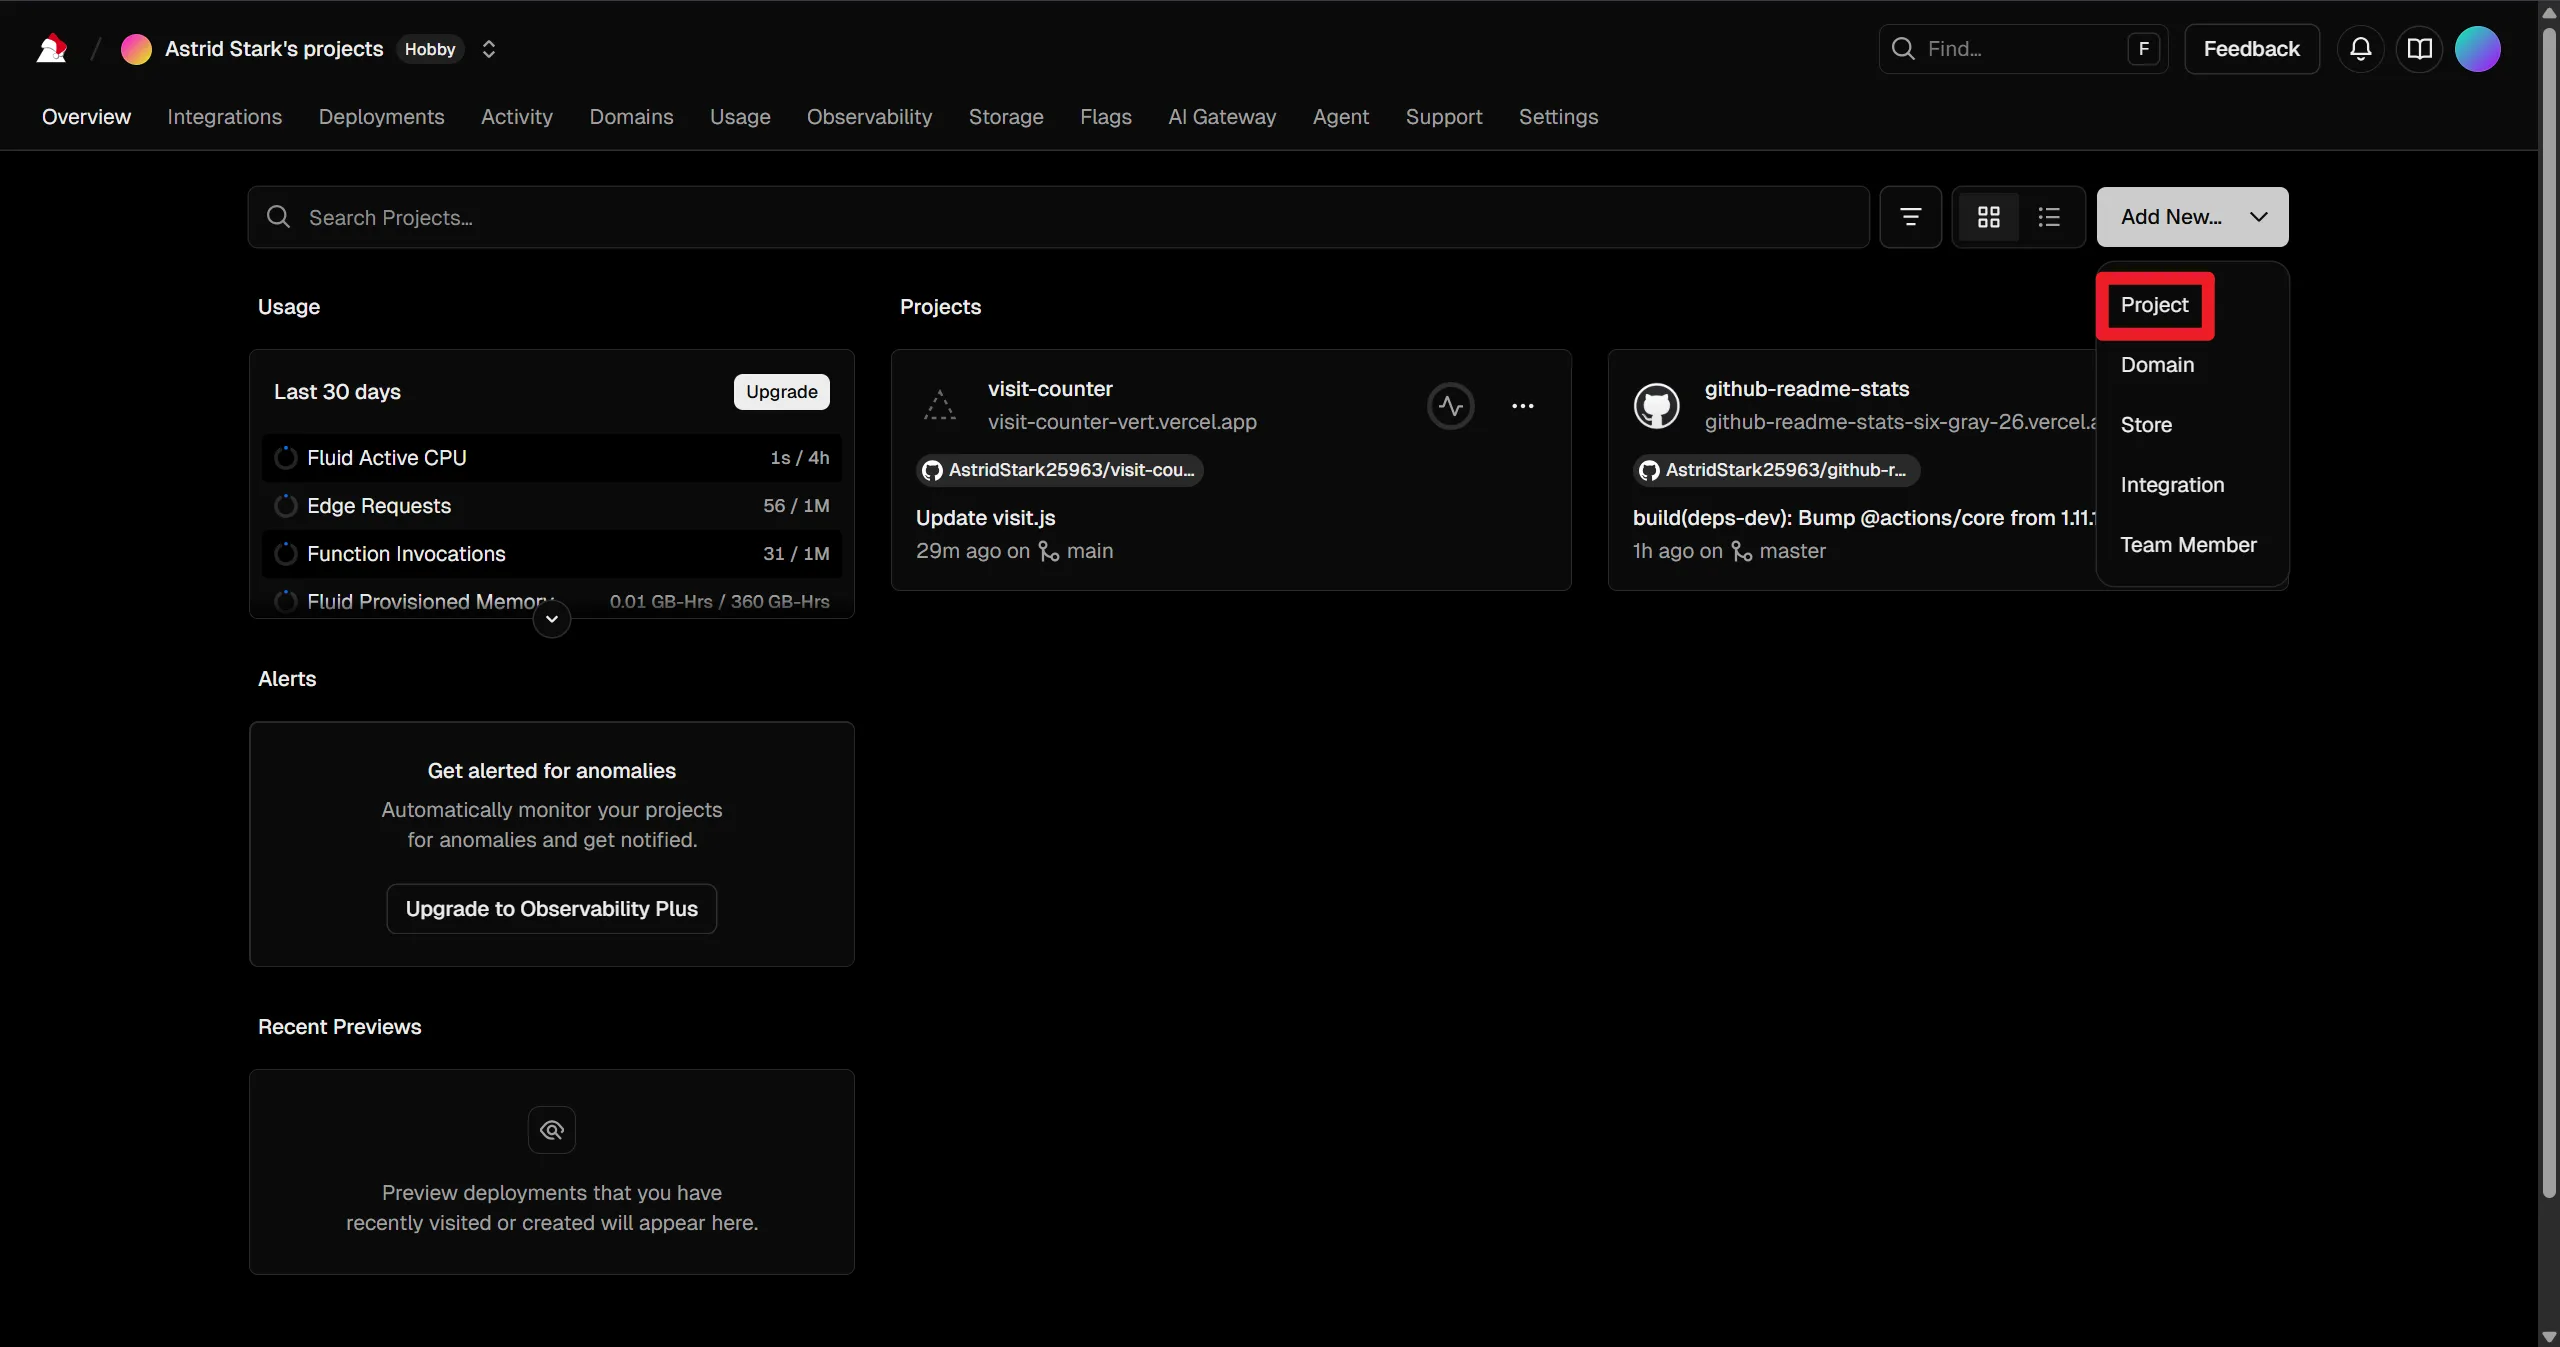
在 Vercel 创建新项目并导入 fork 后的仓库。
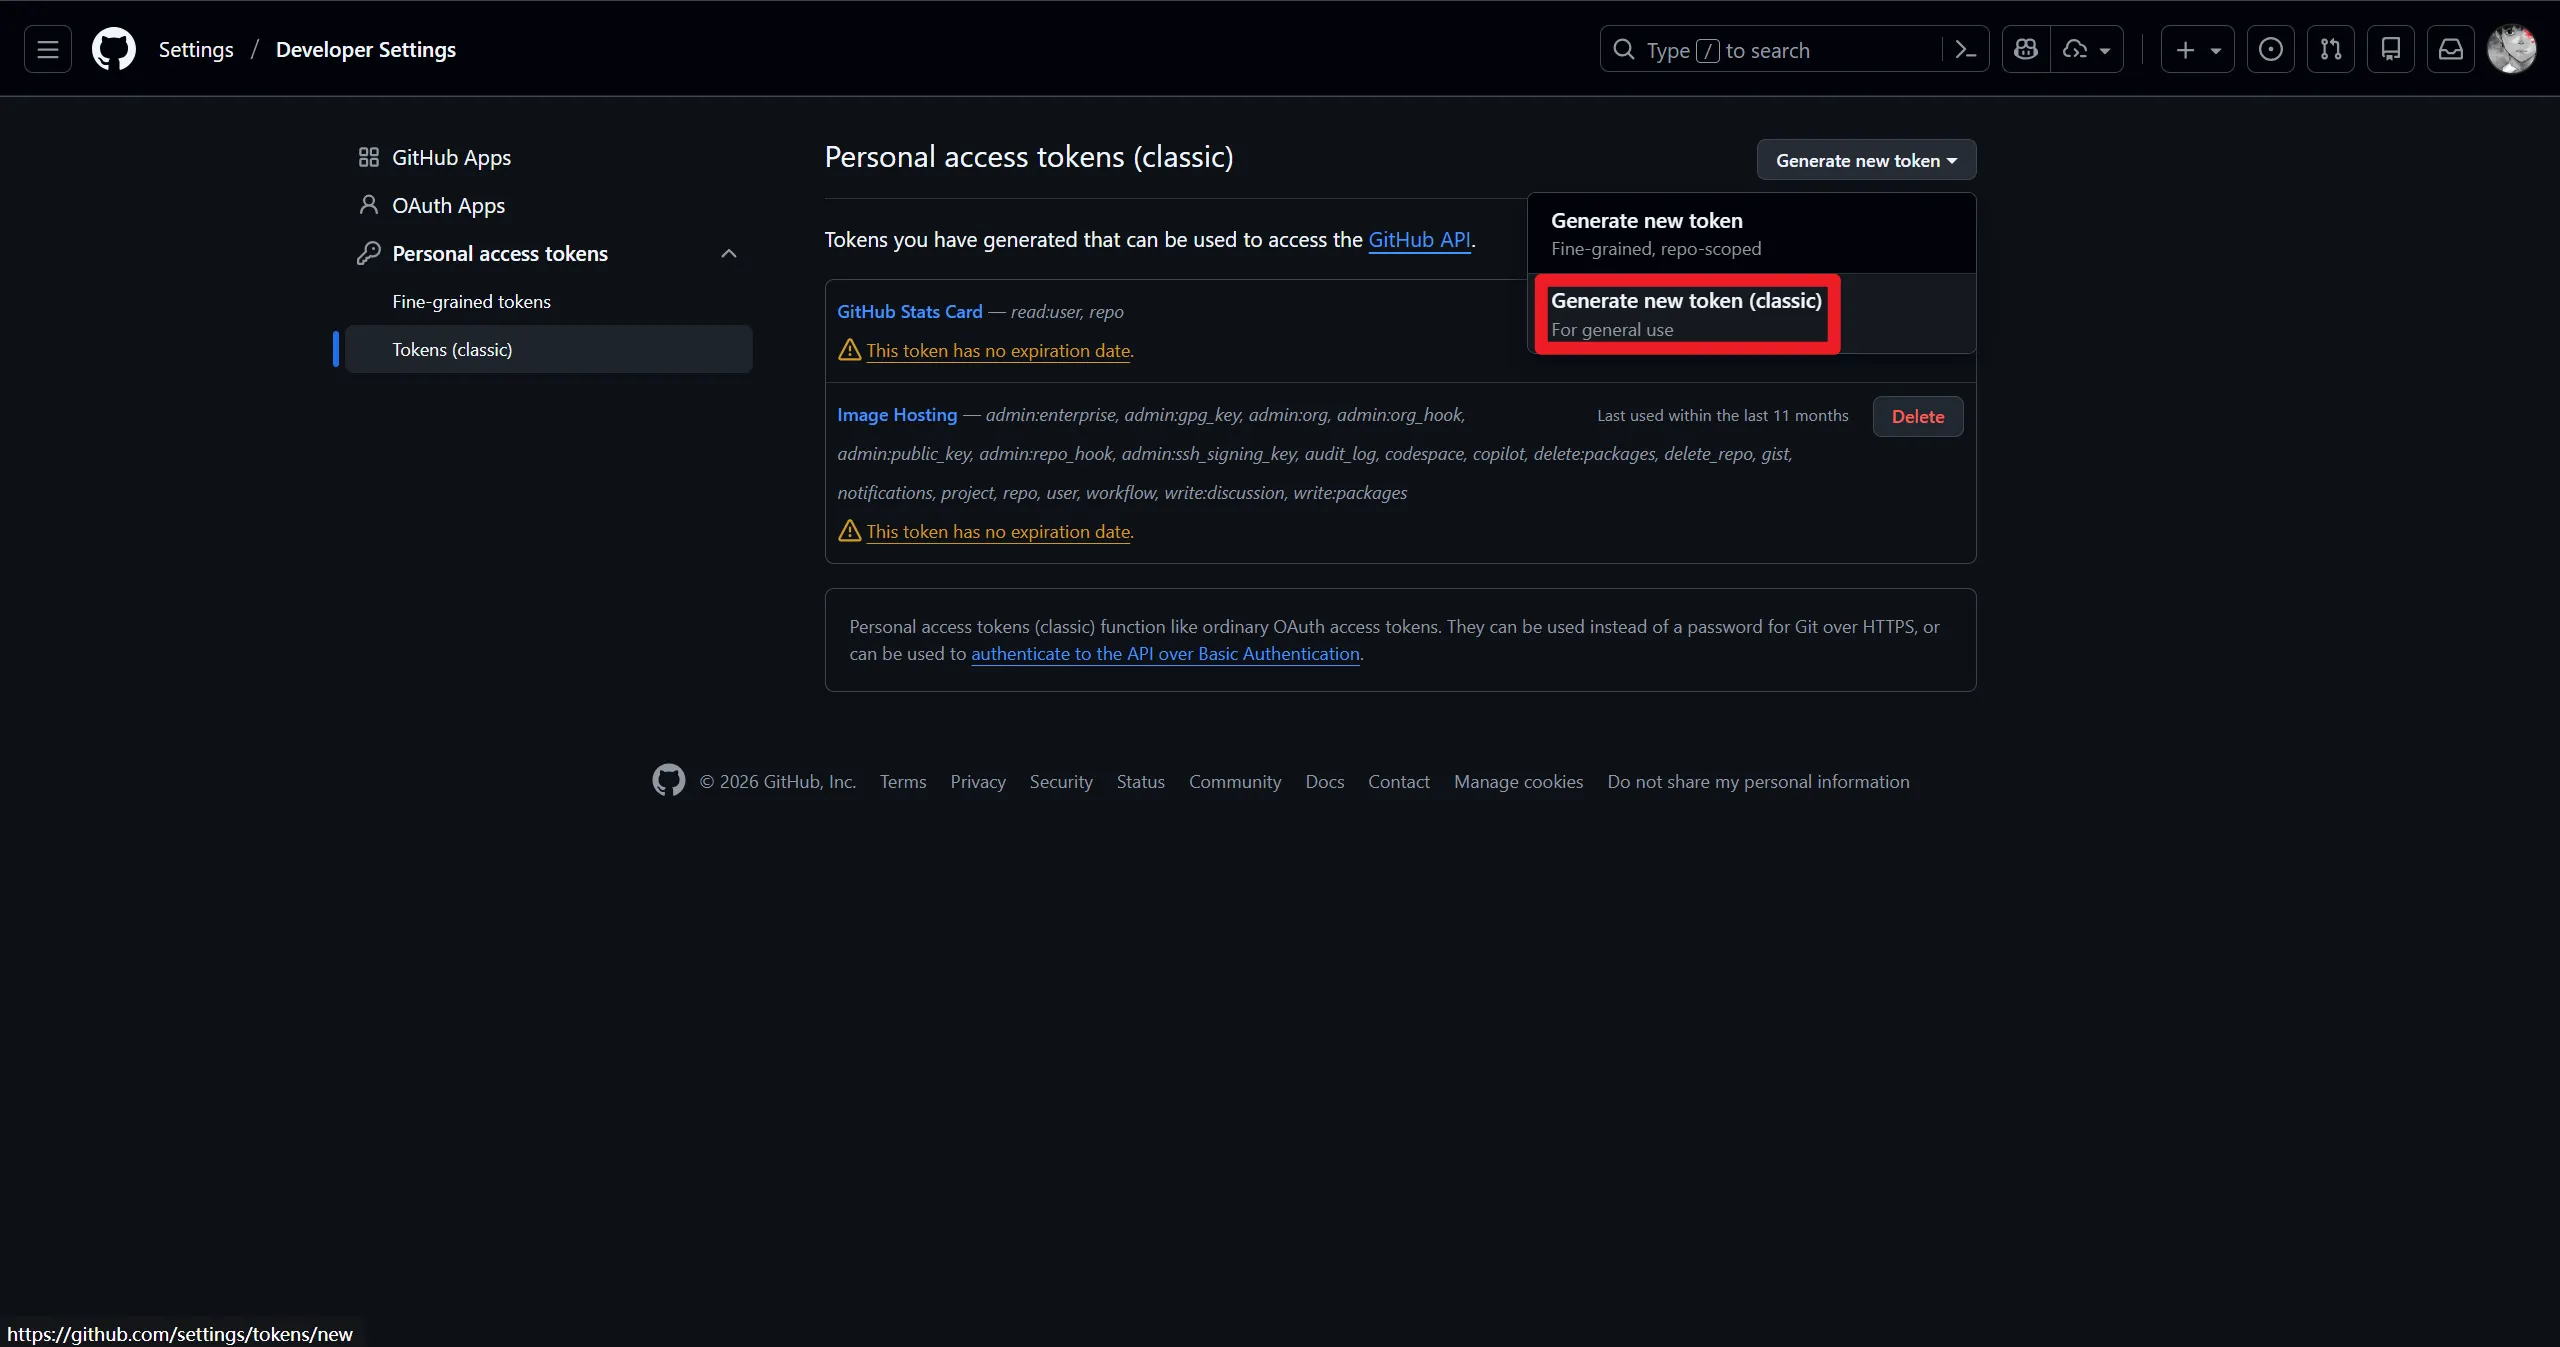
访问 GitHub Tokens 页面并创建一个 Token。
创建 token 时,选中 repo 和 read:user 两个选项,点击创建,并将 token 填写到 Vercel 项目的环境变量中,然后点击部署。
等待构建成功,效果如下图所示:
此时使用域名(以如图域名为例,实际以部署后的域名为准):
1
| <img src="https://github-readme-stats-six-gray-26.vercel.app/api?username=用户名&show_icons=true&count_private=true&theme=transparent" />
|
三、自建库 + 自定义卡片/计数器
如果想做访客计数、自定义样式或组合多种信息,可以采用这种方式。
以自建一个访客计数器 (Vercel Edge Function + Upstash Redis) 为例:
首先新建一个小仓库(例如 visit-counter),在根目录创建 api/visit.js:
1
2
3
4
5
6
7
8
9
10
11
12
13
14
15
16
17
18
19
20
21
22
23
24
25
26
27
28
29
30
31
32
33
34
35
36
37
38
39
|
export const config = { runtime: 'edge' };
const svg = (count) => `
<svg xmlns="http://www.w3.org/2000/svg" width="150" height="28" role="img" aria-label="Visitor Count: ${count}">
<linearGradient id="smooth" x2="0" y2="100%">
<stop offset="0" stop-color="#bbb" stop-opacity=".1"/>
<stop offset="1" stop-opacity=".1"/>
</linearGradient>
<rect rx="4" width="150" height="28" fill="#555"/>
<rect rx="4" x="70" width="80" height="28" fill="#4c1"/>
<rect rx="4" width="150" height="28" fill="url(#smooth)"/>
<g fill="#fff" text-anchor="middle" font-family="DejaVu Sans,Verdana,Geneva,sans-serif" font-size="12">
<text x="35" y="18">Visitor</text>
<text x="110" y="18">${count}</text>
</g>
</svg>`;
export default async function handler() {
const { UPSTASH_REDIS_REST_URL, UPSTASH_REDIS_REST_TOKEN } = process.env;
const key = 'visits:用户名';
const resp = await fetch(`${UPSTASH_REDIS_REST_URL}/incr/${key}`, {
headers: { Authorization: `Bearer ${UPSTASH_REDIS_REST_TOKEN}` }
});
const data = await resp.json();
const count = typeof data.result === 'number' ? data.result : data.result || data;
return new Response(svg(count), {
status: 200,
headers: {
'Content-Type': 'image/svg+xml',
'Cache-Control': 'no-store, no-cache, must-revalidate, max-age=0',
'Pragma': 'no-cache',
'Expires': '0',
},
});
}
|
在 Cache-Control 部分添加 no-store, no-cache, must-revalidate, max-age=0 等多个参数,是为了尽量避免 GitHub / Camo 长时间缓存导致就算刷新页面也无法增加计数器计数的情况。
然后在 Vercel 创建项目导入该仓库。
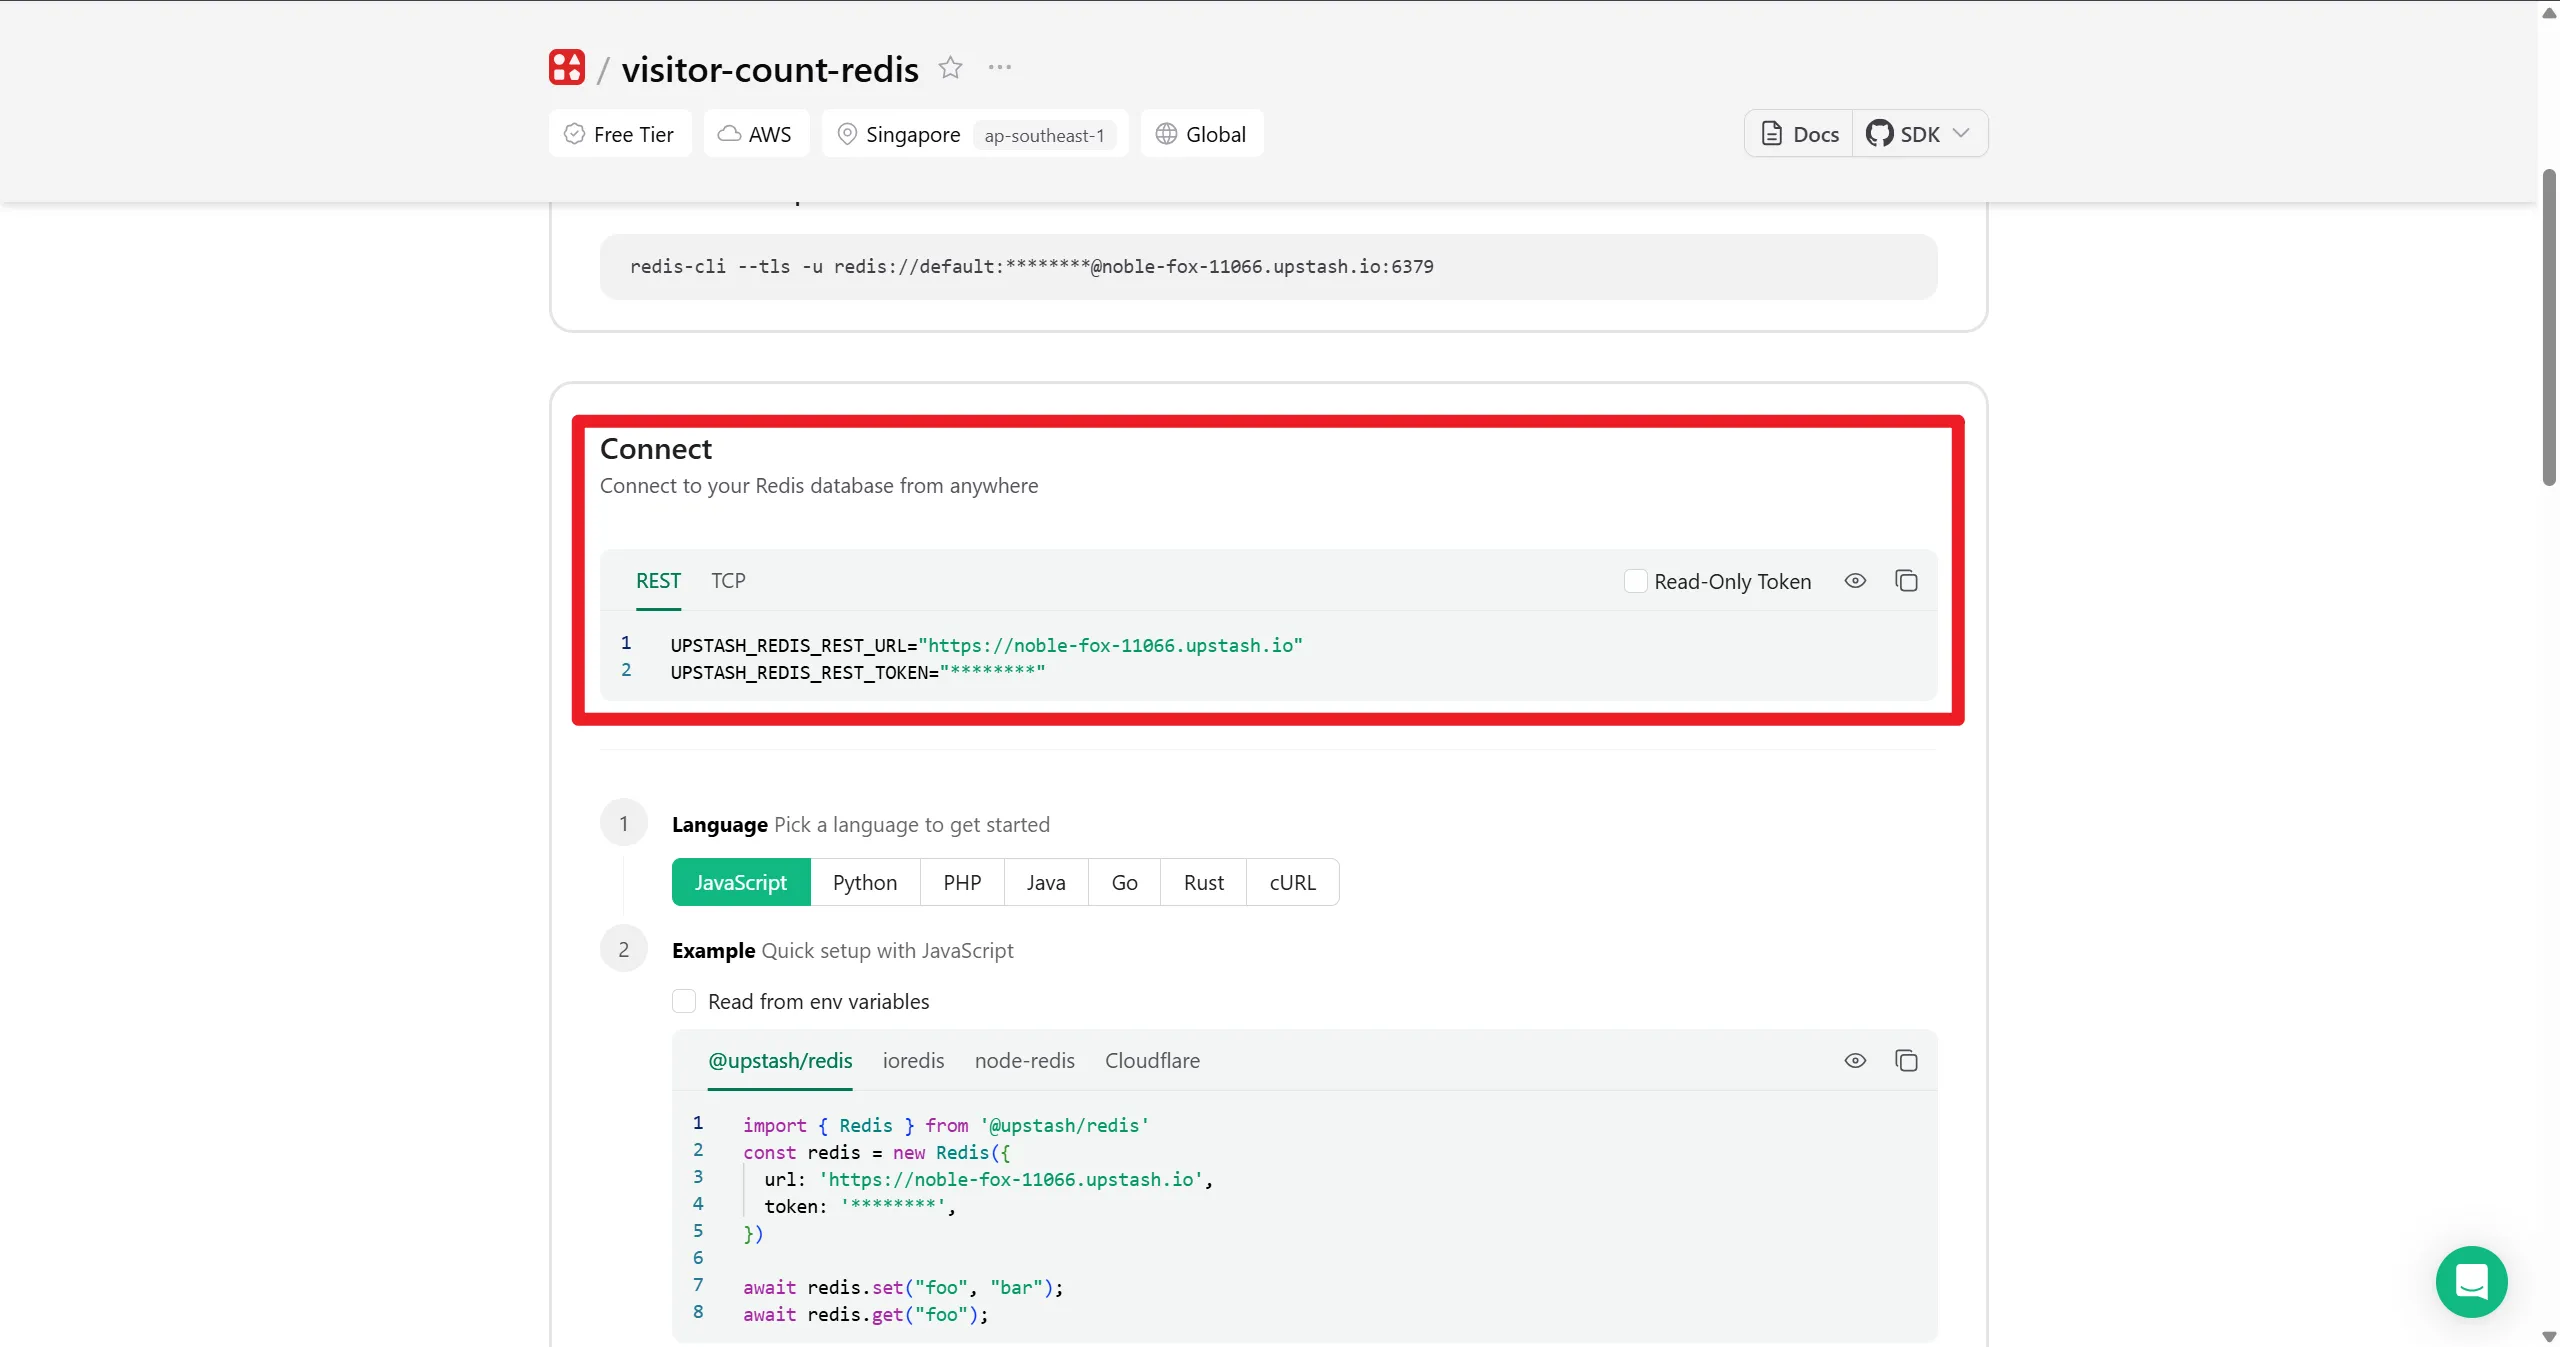
在 Upstash 创建一个免费 Redis 实例,并将如图所示两个参数的名称和值添加到 Vercel 实例的环境变量中。
不要选中 Read-Only Token 选项,因为如果开启此选项,Upstash 会提供一个只能读的 token,无法执行写操作(如 INCR/SET)。访客计数的计数器要自增,必须能写。
部署完成后在 README 引用:
1
2
3
4
| <div align="center">
<img src="https://计数器域名.vercel.app/api/visit" alt="Visitor Count"/>
</div>
</br>
|